Template for Interactive Jupyter Notebook
To help you understand how interactive Jupyter Notebooks work, we have prepared a simple template notebook that you can take and develop further. In this notebook, you will see how to compose interactive buttons, create analytical functions, and access containers. What modules and tools you use next is up to you and your analytical needs. An example of a complex interactive notebook is in the next section Examples → Analytical Scenario.
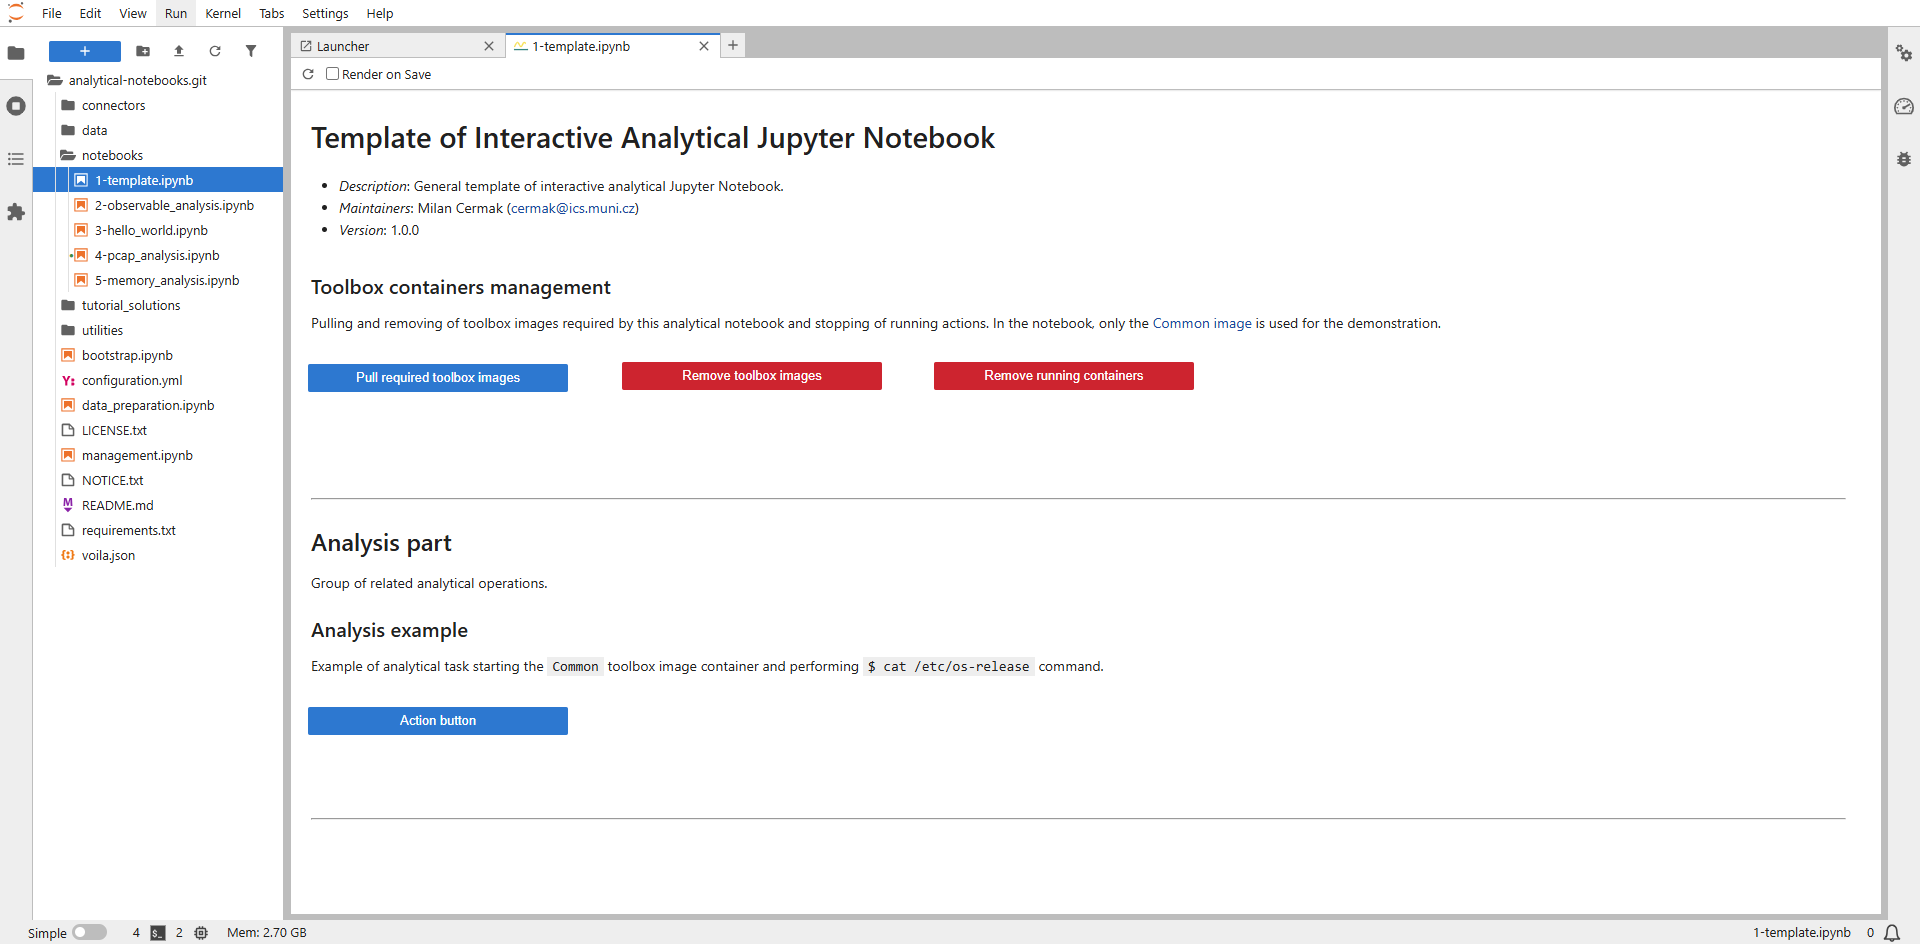
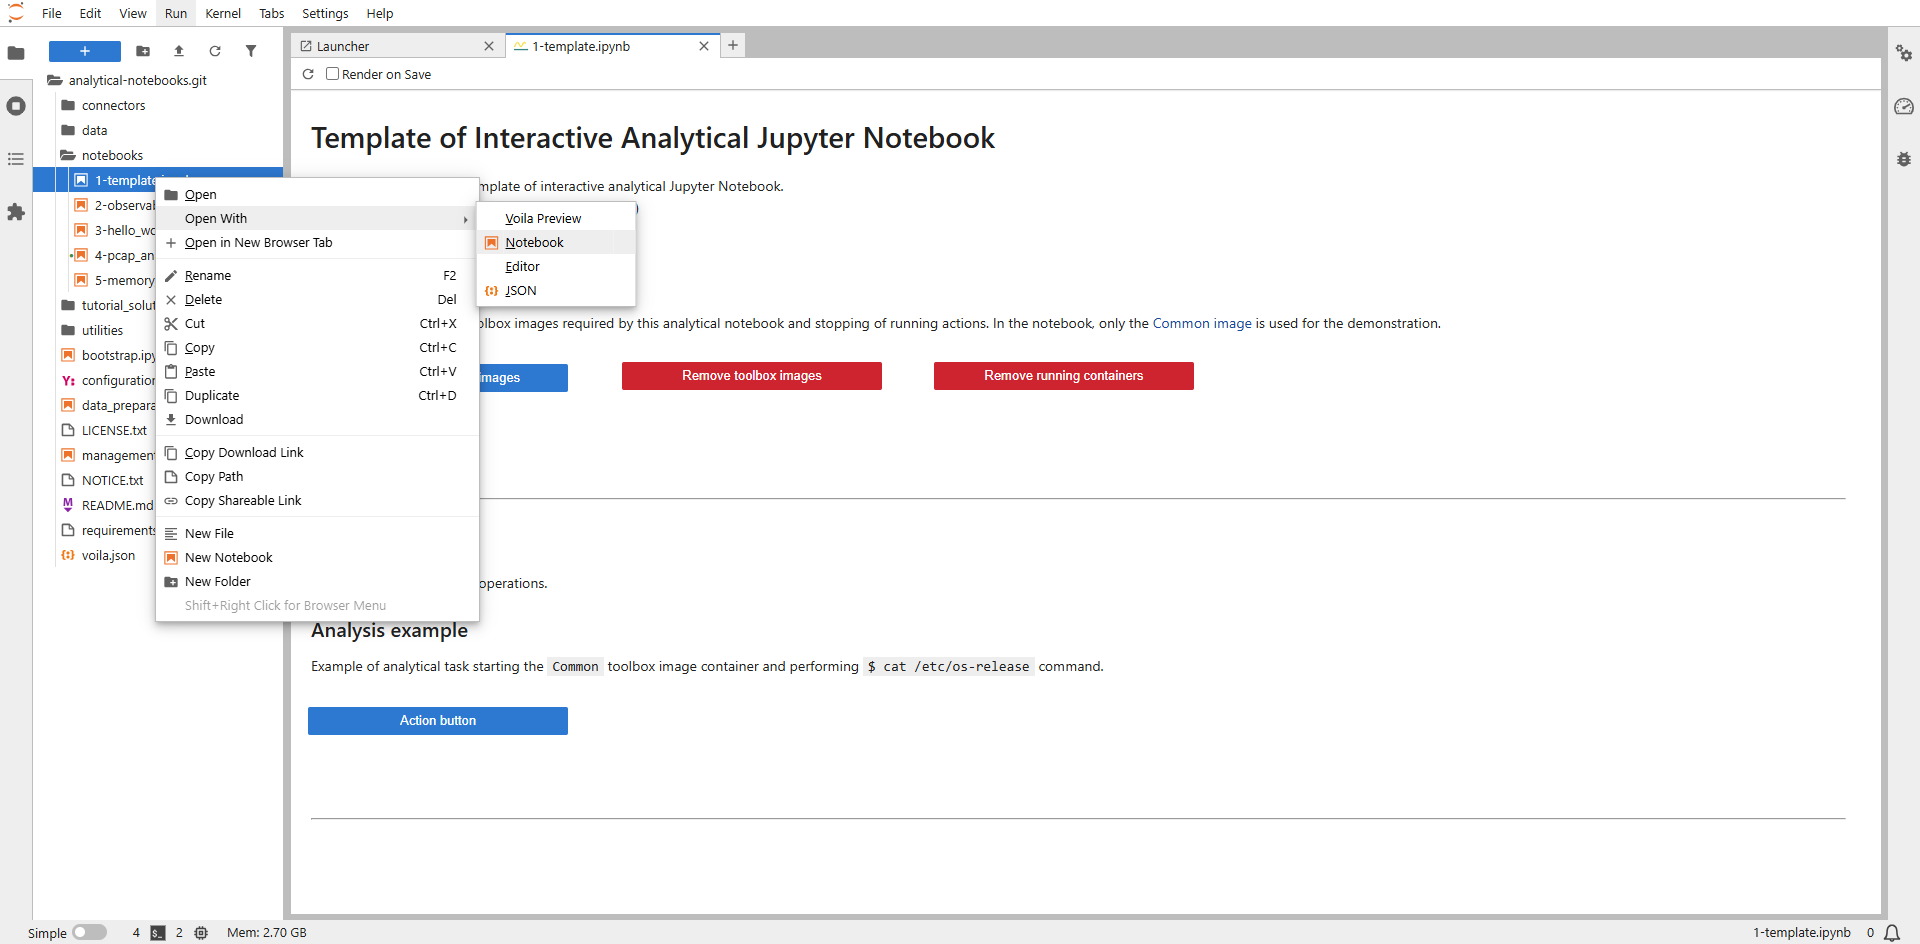
To open and run the template notebook, double-left-click on the Notebooks directory in the right menu and double-left-click on the notebook named 1-template.ipynb. If everything went well, you should see the notebook rendered by the Voila extension, as shown in the screenshot below. To open the notebook code (traditional Jupyter Notebook view), click on the notebook name and select Open with → Notebook. In the provided JupyterHub environment, running the notebook using Voila is the default option. If you use local deployment, the traditional view is the default option.
Note
If you first run the notebook via Voila and then open the traditional view, the kernel will not be assigned to the notebook and won't be able to run. If you want to open and run the traditional view of the notebook together with Voila rendering, you need to open the traditional notebook first and then open and run it through Voila.
Notebook sections
The template notebook is divided in the three sections. The first two sections are generic and should be the same for most notebooks. The third section presents an example of the analytical part itself. Analytical notebooks typically consist of several such sections.
Header and initialization
The notebook should start with the markdown section containing the notebook name, description, list of maintainers, and version. The definition of the version is vital as notebooks can change significantly during the development, and the analyst should know what version is currently being used.
The following parts of the notebook's header section consist of code parts that are not displayed to the analyst when using Voila:
1. Modules import and environment preparation
This section part is used to initialize the entire notebook and include all Python modules that are used. An important part is loading connectors (modules in the directory connectors), which are used to communicate with various external services and process the analyzed data.
Note
These connectors are part of the project and need to be implemented. In the project repository, you can find several connectors you can utilize or use as an inspiration for developing new ones.
The remaining code blocks of the section part no longer require developer intervention and can be taken as-is. At first, the logging is set (you change the variable logging_level to, e.g., DEBUG to gain a more detailed overview of the errors). This code block is followed by loading of the configuration file. In the final code block, the selected container manager is initialized (Podman or Docker, according to the configuration file). If the notebook does not use the toolbox container images, it is possible to omit this last code block.
2. Global variables definition
The second section part serves as a definition of global variables. For example, if toolbox container images are used, you must define a list of their IDs to be initialized correctly. The following code specifies that only the common tool from the toolbox will be used in the notebook.
"""Global variables definition.
"""

# Required toolbox images needs to be defined in the configuration file
REQUIRED_TOOLBOX_IMAGES_IDS = ["common"]
3. Definition of main action buttons
The third part of the initial notebook section consists of defining the main action buttons. The main buttons need to be defined at the beginning so that all other notebook parts can access them and deactivate or activate them according to the analysis state.
"""Definition of main action buttons.
"""
# The definition of buttons in this part of the notebook makes it easy to disable them and make them available in other parts.

# Action button example (see https://ipywidgets.readthedocs.io/en/latest/examples/Widget%20List.html#button)
w_action_button = widgets.Button(
    description="Action button",
    tooltip="Action button",
    button_style="primary",
    disabled=False,
    layout={"width": "20em"}
)
Toolbox containers management
This section only makes sense if tools from toolbox containers are used. This section does not need to be modified in any way and can be taken as-is. For simplicity, we will omit the code description and explain only functions available via displayed buttons:
- Pull required toolbox images – Pull of all container images specified in the
REQUIRED_TOOLBOX_IMAGES_IDSvariable. This action must be performed whenever the container image is unavailable locally in the container manager instance. - Remove toolbox images – Remove all container images specified in the
REQUIRED_TOOLBOX_IMAGES_IDSvariable from the local container manager instance. - Remove running containers – Delete all containers that were started during the analysis. This feature is handy when processing errors occur and the containers are not terminated correctly.
Note
The work with containers is divided into three actions. At the beginning, the container is started. Afterward, various commands are executed in it according to the needs of the analysis. If the container is no longer needed, it can be switched off. To keep the container running and not shut down immediately after starting, you need to define ENTRYPOINT ["sleep", "infinity"] in Dockerfile as defined, for example, in the Common tool.
Analysis part
This section is the main part of the notebook and consists of various analytical functions and data visualizations. A notebook may typically contain more than one such section. We recommend dividing each section into the following three code parts for better code readability.
1. Widgets definition
The first section code should contain the definition of all used widgets (see Widgets List). An important widget is Output, which allows you to dynamically change its content and display the processing progress and analysis results, including visualizations. Without this widget, displaying the results correctly through Voila would not be possible.
"""Define all widgets.
"""
# The main action button for the analysis is already defined in the initial part of the notebook.

# Action output widget (see https://ipywidgets.readthedocs.io/en/latest/examples/Widget%20List.html#output)
w_action_output = widgets.Output(layout={"margin": "1em 0 0 0"})
2. Widget functions definition
The second section code contains functions associated with action buttons. In these functions, you can run individual analytical operations and display their outputs. An essential part of these functions is the with <OUTPUT_WIDGET_VARIABLE_NAME>: part, ensuring that all outputs performed below are redirected to the Output widget and not to the standard notebook output.
Note
If you use any functions frequently across sections or even multiple notebooks. It is advisable to define new modules that provide the functionality. Examples of such modules can be found in the Utilities directory.
In the following code sample, you can find a function running the Common tool from the toolbox and executing the $ cat /etc/os-release command. The output of this command is then displayed to the analyst in the defined Output widget.
"""Define widget functions.
"""

def on_click_function_example(button):
    # Disable the action button
    w_action_button.disabled = True

    # Use defined output widget
    with w_action_output:
        # Clear previous output
        w_action_output.clear_output()

        # Start Common toolbox image container
        container_name = containers_manager.start_tool(tool_id="common")
        if not container_name:
            logger.error("Cannot start container for the Common toolbox image (please check if it was pulled successfully)")
            # Enable the action button
            w_action_button.disabled = False
            return
        running_toolbox_containers.append(container_name)
        logger.debug(f"Started container '{container_name}' for Common toolbox image")

        # Perform required action
        command_result = containers_manager.execute_command(container_name=container_name, command="cat /etc/os-release")
        if not command_result:
            logger.error("Command execution failed")
        else:
            logger.info(f"Command execution result STDOUT:\n{command_result[0]}")

        # Remove running Common toolbox image container
        if not containers_manager.remove_container(container_name=container_name):
            logger.error("Cannot remove requested container")
        else:
            running_toolbox_containers.remove(container_name)
            logger.debug(f"Container '{container_name}' removed")

        # Enable buttons on action success
        w_action_button.disabled = False
w_action_button.on_click(on_click_function_example)
3. Widgets display
The last section of the code defines the widgets layout and displays the widgets to the analyst.
"""Display widgets.
"""

# Use combination of HBox and VBox (see https://ipywidgets.readthedocs.io/en/latest/examples/Widget%20List.html#container-layout-widgets)
widgets.VBox([w_action_button, w_action_output])
Notebook execution
If all notebook sections are defined correctly, it can be started using Voila and the provided analytical functions. Press the pull button first if the toolbox container image is not downloaded locally. Then, you can use the individual functions and get their output, as shown in the screenshot below.
